SOME 1958, 1959 AND 1960 SQUAREBIRDS DO HAVE GLOVE BOX LIGHTS
IT WAS AN OPTION FOR EACH OF THOSE YEARS
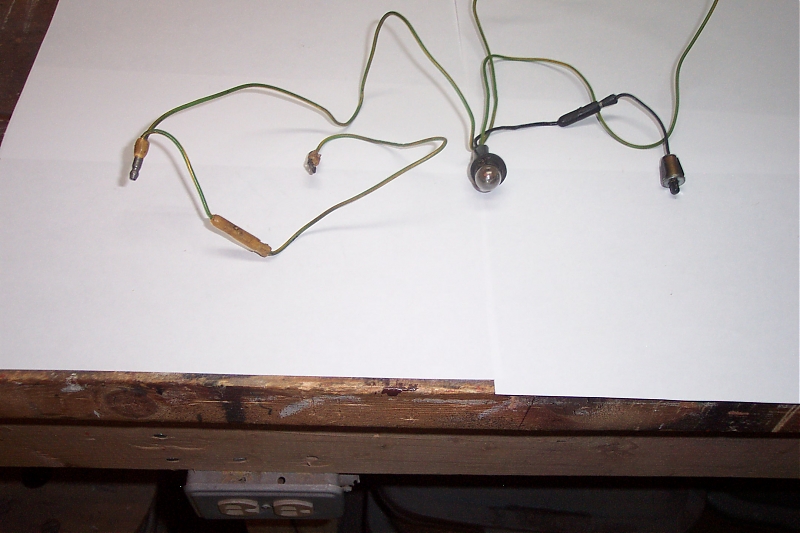
"I happened to take a picture of the glove box light when I disassembled my Golde Top dash a week ago." Then he went on to post the schematic and instructions on how it mounts. You will find those and the comments of Bart Como and others here. Alexander's 430 J code Tbird has the glove compartment light in it. Bart's does, and I think some of our other members have mentioned that they do to. It was one of the options listed for all three years.
'58 Optional Equipment ($10)
'59 Optional Equipment ($9.50)
'60 Optional Equipment ($9.50)
Many of you might have the optional glove compartment light, only you may not have noticed it because it might be burned out. Or... It could be there but has been pushed into the opening off to the side of the glove box and behind it. You might take out your glove box. You might find you have one! It is not hard to fix.
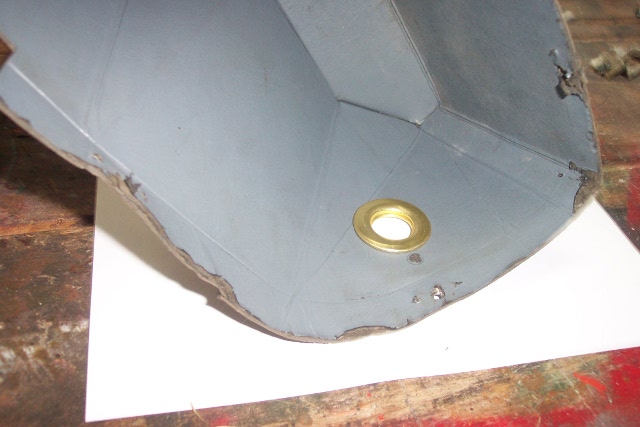
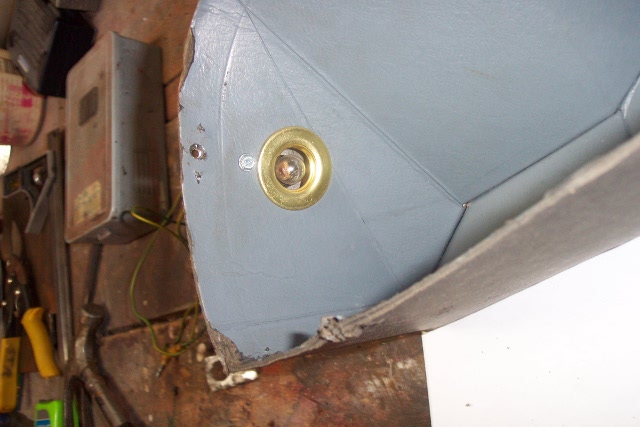
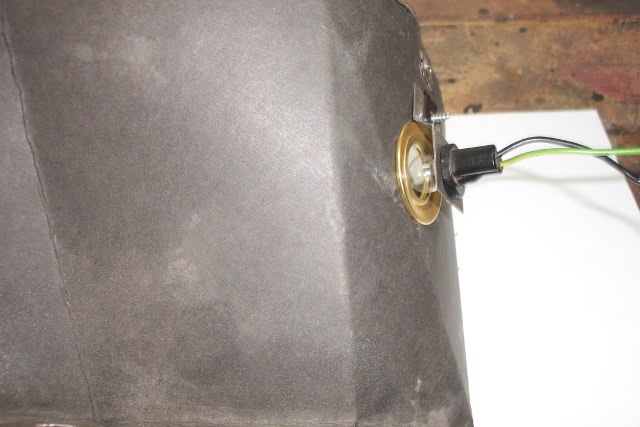
I am going to put the information and pictures that Howard Prout provided us on the Forum as to how he installed his glove box light. His light hole has a grommet in it and he explains why. If you cut your hole evenly, you will not need the grommet.
My glove box did not have a hole for the light to shine through so that complicated things a bit. I can't remember if the original glove box liners had holes for the light or not. I think I remember seeing replacement liners with knock-out holes several years ago but my replacement liner didn't have one. I noticed in both Bart's picture and the schematics that the bracket to hold the light socket was attached to the inside of the liner and went out through the hole that the light is to shine through. I couldn't figure out how to hold the bracket to the liner that way so decided to attach the bracket to the outside of the liner. I made one bracket shaped like an open "V" as shown in the various references. Then I thought it would be more effective if the bulb pointed straight into the hole so I made a bracket more in the shape of a "Z" to hold the bulb over the hole but not in the glove box. The next thing was to cut the hole in the cardboard liner. Bart's picture shows a liner with a nice round hole. I thought the best way to replicate that was to use a wood speed bit with raised edges on the periphery to score the cardboard around the edge of the hole for a clean cut. It didn't work as planned so now I had a jagged hole. I thought about what to do with this for a while and eventually thought of a grommet. I went to an awning maker and he had an appropriate sized grommet and he lent me his staking tool. It took a bit of time to get everything positioned correctly but then a couple of strikes and it was firmly in place. Now I have a nice round hole for the light to shine through. The next step is to install the switch and then connect the wiring harness.
Here are the pictures that Howard provided us.
|

|
|
|
|
Glove Box Light
Created: 19 April, 2009
Last Edited: 30 April, 2010
Email: webmaster@squarebirds.org
Return to Squarebirds Home.