 Tweet
Tweet
I wanted to introduce myself my name is Kevin and I just picked up this 59 Thunderbird and I plan to go pretty wild on this restoration I wanted to post some pictures of the car but I can't attach any images and if anybody can tell me how to do that and I'd be great.
-
-
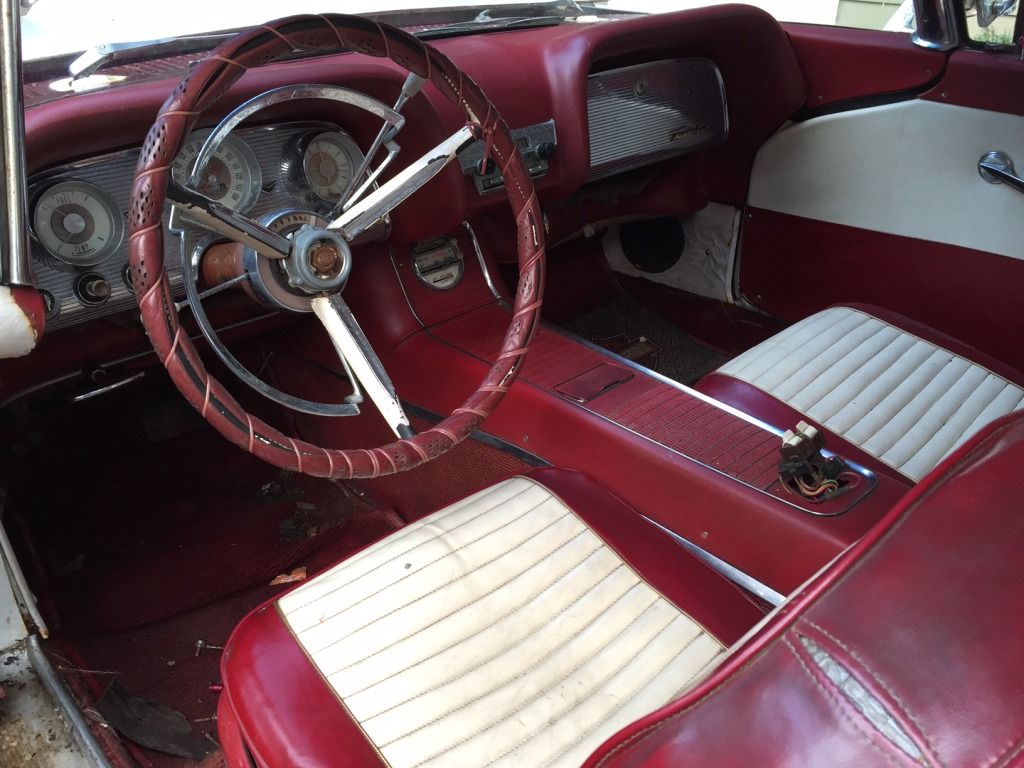
Kevin's 59 t-bird restoration. Aka "angry bird"
Hi Kevin, apparently, you did not read the Welcome that I posted to you in the New Members Welcoming Forum. I sent you a Private Message about that also. If you will click on this link, and read down through it, you will find the information on how to go about posting pix on this Forum. There are at least 3 ways to do it. One of them you already know about because you used Photobucket to do it. When you do post from Photobucket, or any other means, you MUST keep your pix to no bigger than 800x600 pixels. I see from the pix you put in Photobucket that she has the red and white interior. Here is the link.
http://www.squarebirds.org/vbulletin...ad.php?t=18002
Ray Clark - Squarebirds Administrator
The Terminator..... VTCI #11178 ITC #6000 Yellow Mustang Registry (YMR) #12188
Contact me via Private Message for my email address, or Call (Cell) 210-875-1411
https://www.squarebirds.org/picture_gallery/TechnicalResourceLibrary/trl.htm
Faye's Ovarian Cancer Memorial Website.
https://faye.rayclark.info/index.html -
Thanks. I read the link.
Anyhoo, today i pulled the driver window motor because I'm just hearing clicks and nothing more in the door.
I believe everything is seized due to the moisture out where this car has sat for 10 years.
I unbolted the 2 3/8 inch nuts and wiggled out the motor. My question is: should I be able to manually press the window down without the motor in place? Or do I have to pull the entire regulator out as well to free the window?
Thanks!Comment
-
The regulator has a counter weight spring on it so you will have to remove the regulator to manually move the window up and down.
JohnJohn Pizzi - Squarebirds Administrator
Thunderbird Registry #36223
jopizz@squarebirds.org 856-779-9695
https://www.squarebirds.org/picture_gallery/TechnicalResourceLibrary/trl.htmComment
-
Driver window
I took a bolt that was the same diameter of the motor shaft, cut the head off and then ground a flat on the bolt to match the end of the motor shaft. Then I put the modified bolt in a battery powered drill and used the coupling to connect it to the regulator. If the regulator is not totally frozen, you should be able to move the window up and down with the drill motor.
Nyles
Comment
-
Kevin, I know you are in California but out east we are used to loads of rust. It's an ongoing battle for us because of all the salt we use on ice and snow. Clouds of salty mist are kicked up by wet tires especially on interstates. Unless we have a heated garage, the concrete floor sweats. Many of my buddies line the floor with cardboard as an insulator.
90% of restoration is in 'cleanup' (de-rusting, painting) and general fabrication. The easy part is putting it together after all the parts are clean. - DaveMember, Sons of the American Revolution
CLICK HERE to see my custom hydraulic roller 390 FE build.
"We've got to pause and ask ourselves: How much clean air do we need?"
--Lee Iacocca
From: Royal Oak, MichiganComment
-
Thanks Dave! Yeah my last restoration was a 69 mustang fastback from Detroit.
Called it the rustang. Absolutely no floor pans like the flinstones lol. Also some genius had used roofing tar to cover the underside which I had a sweet time melting off with a torch to repair the floors frame and torque boxes.Comment
-
Test with picture....Comment
-

Here's the driver motor I pulled. I cleaned it a little, left it overnight with wd40. I could not spin the shaft yesterday,but today I freed it. I want to bench test the motor. What is the function of the green wire? I get nothing when grounding black and trying red or yellow on 12V. Just a spark at the connection of the battery. I figure I have to dissassemble, by unscrewiing the studs with the 5/16 nut?
I did read the TRL on it.Comment
-
Worked like a CHARM. I used a 5/16 by 1.5" Bolt and made the indent.
Took my Ryobi Drill and a 1/2 Socket and boom there she went down! Moved smooth and the ratio for the regulator is pretty low. I think the regulator is perfect and I will just have to clean all the motors. Front and back.
Comment
-
Window Motors testing
Glad to hear the drill motor worked for you. I use this when installing or adjusting a window. Makes control really easy.
As for testing the motors, here is how to hook up the wires:
1. Connect the black lead out of the motor to battery ground (negative)
2. Join the green and red wire together and connect this to Battery +. Motor should run.
3. Join the green and yellow wire together and connect this to battery +. Motor should run in the opposite direction.
Just as info, the wiring noted above will also work on the seat motors.
Nyles
Comment
-
Window Motors
Kevin:
I forgot to mention, that if you decide to take the window motors apart, make sure you clean the shaft that connects to the coupling, really well. If there is any rust or corrosion on the shaft, you will do damage to the internals when you try to split the motor housings.
There are some great pictures and information on the window motors in the TRL. There are also 2 different style motors used in our cars.
Nyles
Comment


Comment