Announcement

Collapse
No announcement yet.

Control Valve Power Steering Removal

Collapse
X
 
  • Time
  • Show
Clear All
new posts
  • bcomo
    Super-Experienced
    • Sep 23 2005
    • 1223

    #16
    Update

    I just got off of the Phone with Randy Meyer from Precision Products. He rebuilds our control valves for $90 (if it doesn't need any hard parts). Take a minute to look at his web page and the description of what he does to bebuild it.


    The good thing for me is that he is about 10 miles away from me in San Antonio.

    Next, we talked about how to get the ball stud off. He said that the Jaw type pullers have broken when he's used them too. He said that he now uses the type of puller below.
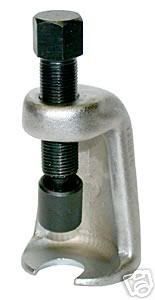


    The other important thing, Randy said, was to use an impact gun on the bolt of the tool. He said that using an impact gun hammers the bolt to loosen the stud without any side to side motion (which ruins the ball stud socket).

    Randy has offered to loan me his puller -- which I thought was a really nice thing to do. I already have a compressor, and it just so happens that I'm getting an impact gun under the tree this year

    By the way, I checked a few T-Bird parts houses and found the cost on a rebuilt control valve to be getting out of sight. Anywhere from $200 to $300 WITH a rebuildable core. If your core isn't rebuildable, then add another $100 to the cost.

    Bird Nest lost their rebuilder, and doesn't even offer the control valve any more. And the internal metal "hard" parts to rebuild them are getting harder to find. So be careful getting this thing off.

    I'll post something when I can try to get this done.
    Bart
    1960 Hard Top/430
    Thunderbird Registry Number 1231

    Comment

    • KULTULZ

      #17
      Thanx for the research Bart!

      Looks like I will be buying that style of puller now....

      Comment

      • bcomo
        Super-Experienced
        • Sep 23 2005
        • 1223

        #18
        Gary:

        Let's see how this works first.

        I did find the same style tool on E-Bay, and it was the only one that had a PDF drawing with dimensions. Not to buy, just for reference.

        Item number: 170281492691
        PDF File http://www.tooladdiction.com/TOOL%208302.pdf

        I made a mock-up of the jaws with the correct drawing thickness of 3/16 out of cardboard. Then I slid under the car and guess what -- it fit in there perfectly.

        So, for now, this PDF file gives good dimensions of what will get between the ball stud and the pitman arm end. There is enough room for the rest of the tool to fit if it's slid in from the side.

        I'll see what the brand and dimensions are of the tool that Randy loans me -- and if it works.
        Bart
        1960 Hard Top/430
        Thunderbird Registry Number 1231

        Comment

        • KULTULZ

          #19
          OTC makes the tool and being the high bucks guy I am... ...is what I buy for specialty tools.

          That site you gave is very informative...


          Let us know how it all comes out.

          Comment

          • dgs
            Super-Experienced
            • Feb 13 2003
            • 962

            #20
            Sorry I'm late to the party.

            Yeah, I had a heck of a time with mine (Here's the thread, FYI). Tried the puller you tried and another, I think, with the same results. Tried the pickle fork too, but was afraid to hit it hard enough to make a difference, thankfully.

            In the end, it was Alexander's advice that proved to be the best:
            Originally posted by Alexander
            I know these control valves are a pain to get out after 40 plus years. Soak and tap. Soak overnight if need be. Tap, tap, tap and suddenly it just breaks loose.
            After a lot of tapping it suddenly popped off like it had just been resting in place all along. One tap and it seemed to be welded, the next it was free. Frustrating, but there ya go.

            I ended up with threads like that pic that KULTULZ posted. Worse, actually, the cotter pin hole was oval.

            Take your time, relax, tap, tap, tap, tap, tap, tap, tap. ... tap, tap, tap - POP! Be patient and persistent, it'll come off.

            Oh, and I seem to remember that I got new sockets with my rebuild kit, but don't recall for sure.
            DGS (aka salguod)
            1960 Convertible - Raven Black, Red leather
            www.salguod.net

            Comment

            • bcomo
              Super-Experienced
              • Sep 23 2005
              • 1223

              #21
              Got the Control Valve out

              The control valve is out with the ball stud in perfect shape.

              Here is what worked for me.

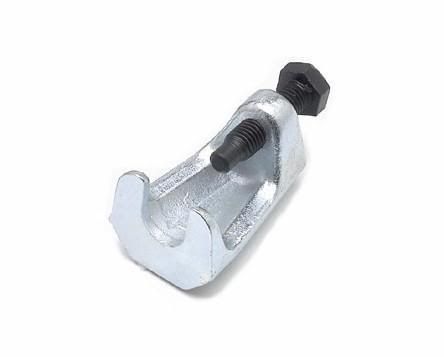
              First -- I used this ball joint puller. It fits perfectly in between the pitman arm and the ball stud. Maybe another of the same kind might work, but this one fits exactly.

              ZDMAK Tools for $17.50


              Their address is:
              14204 Elmira Circle
              Magalia, CA 95954

              Tel 877-938-6657


              Second thing -- I did not use an impact gun. I just used a wrench and a small hammer.

              Remove the cotter pin from the ball stud nut, and remove the nut. Then, turn the nut around and screw it back onto the ball stud until it's just a little higher than the top of the stud.

              Find another nut that will fit on the end of the puller screw. This gives more suface area on the tip of the puller.

              Now slip the puller between the pitman arm and ball stud. The nut on the tool will be in contact with the nut on the ball stud.

              Tighten down medium strength on the puller screw, but don't try to force it. Now tap, tap, tap (small woodpecker taps -- 3 times) on the end of the puller screw. Now tighten the puller screw another 1/2 turn. Tap, Tap, Tap again. Repeat this again, and in my case it just came off no problem on the third try -- total of 5 minute job.

              The trick is to tighten the puller screw a little bit at a time, and then lightly tap, tap, tap on the puller screw in between.

              I brought the Control Valve to Randy Meyer at Precision Products in San Antonio. He rebuilds Control Valves, Steering Boxes, and Power Steering pumps for Fords. http://precisionproductssteering.com/
              He is a great guy.

              While I was there, Randy degreased it, and completely disassembled it to check the wear on all of the inside parts. I was in luck, as the inside parts were in very good shape. So, for $90 I'll have a rebuilt control valve.

              VERY IMPORTANT: Randy said that the control valve comes pre-greased for 12K miles. If and when you do grease it, DO NOT pump loads of grease into it --just 2 pumps is fine. If you put in too much grease, the load of grease in the ball socket will not allow the ball stud to slide to the right side. You will only have power steering to one side. Interesting.


              Other IMPORTANT things:

              1. Have a large flat pan under the control valve when you disconnect the hoses. Lots of rags too. Most all of the fluid (Type F Trans Fluid) will run out when you loosen the hoses.

              2. Remove the roll pin from the clamp on the end of the control valve. The valve will not unscrew if you don't remove the roll pin.

              3. Before you unscrew the valve, count the number of exposed threads on the drag link at the end of the valve. This will get the control valve back in the same spot when you replace it.

              I'll do a post when I get to put the valve back in. Should be this weekend if the weather is not cold.
              Bart
              1960 Hard Top/430
              Thunderbird Registry Number 1231

              Comment

              • dgs
                Super-Experienced
                • Feb 13 2003
                • 962

                #22
                Congrats on getting it apart and nice write up on the process. Wish you had done your first, would have saved me some trouble.
                DGS (aka salguod)
                1960 Convertible - Raven Black, Red leather
                www.salguod.net

                Comment

                • bcomo
                  Super-Experienced
                  • Sep 23 2005
                  • 1223

                  #23
                  Hindsight is always better.

                  I learned ALOT from your front end rebuild, and even though I didn't do it myself, I learned much more than in the shop manual. So, thanks for that Doug.
                  Bart
                  1960 Hard Top/430
                  Thunderbird Registry Number 1231

                  Comment

                  • GTE427
                    Super-Experienced
                    • Oct 9 2007
                    • 602

                    #24
                    Bart,

                    Do you have a item no for the ZDMAK puller you used? The ebay link doesn't display the item, beside the item number will be useful a year from now when someone refers back to this thread for help. Thanks for posting your knowledge in doing this front end work.
                    Ken
                    1959 J Convertible
                    1960 J Hardtop

                    Comment

                    • bcomo
                      Super-Experienced
                      • Sep 23 2005
                      • 1223

                      #25
                      Ken:

                      They don't have a part number stamped on the tool itself.

                      They call it "Tie Rod Tool Ford Chevrolet Chevy Toyota GM Dodge jeep"

                      I searched for "Tie Rod Tool Ford Chevy" on their On-Line store and found it again.


                      There is another one currently listed from them at


                      The important this is:
                      Tie Rod Puller - Jaw Opening size is 3/4 inch.
                      The opening from bolt to jaw = 1 -15/16

                      Sorry that I don't have more info.
                      Bart
                      1960 Hard Top/430
                      Thunderbird Registry Number 1231

                      Comment

                      • GTE427
                        Super-Experienced
                        • Oct 9 2007
                        • 602

                        #26
                        Thanks Bart, that should be enough info for anyone to find this tool n the future from any vendor.
                        Ken
                        1959 J Convertible
                        1960 J Hardtop

                        Comment

                        • Astrowing
                          Experienced
                          • Jul 22 2009
                          • 478

                          #27
                          I got the puller tool last week after spending hours trying to tap the bolt out as described in the Ford manual. The tool worked like a charm as described in previous posts; in five minutes the stud popped out of the pitman arm. I'm very appreciative of the research done to find this tool. Thanks!

                          I dropped the entire steering linkage by also removing the outer tie rods from the spindles and the idler arm bracket 3 bolts that attach to the frame. I'm rebuilding everything and this appears to work extremely well, and it's fast to get it off the car and onto the bench.
                          sigpic

                          CLICK HERE for Jim's web site

                          Comment

                          Working...
                          😀
                          🥰
                          🤢
                          😎
                          😡
                          👍
                          👎