Announcement

Collapse
No announcement yet.

Eric's 1960 T-Bird

Collapse
X
 
  • Time
  • Show
Clear All
new posts
  • simplyconnected
    Administrator
    • May 26 2009
    • 8787

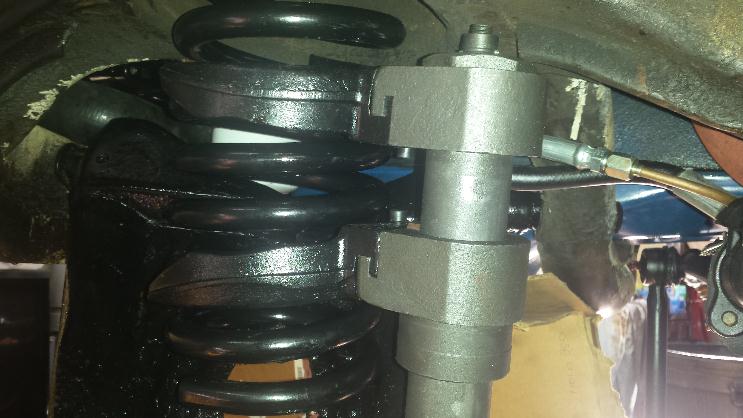
    Eric, most of our ball joints and tie rod ends have a sheet metal cap formed into the assembly with a hole for a zerk fitting.

    The most common classic car zerk fitting is 1/8"-27 NPT. That means National Pipe Thread. Pipe threads are tapered. These straight fittings (not 90 or 45-degree offset) form their own mating threads in the sheet metal. Here is an example... CLICK HERE

    CLICK HERE for 45-degree offset zerk fittings.
    CLICK HERE for 90-degree offset zerk fittings.

    Again, these are 'dirt common' for many decades in U.S. automotive steering compnents. - Dave
    Member, Sons of the American Revolution

    CLICK HERE to see my custom hydraulic roller 390 FE build.

    "We've got to pause and ask ourselves: How much clean air do we need?"
    --Lee Iacocca

    From: Royal Oak, Michigan

    Comment

    • Eric S
      Super-Experienced

      • Jun 10 2018
      • 1054

      Understood but all those parts I have on the car now are 1/4". Did not came into a 1/8" so far and I guess I did not missed any.

      Comment

      • simplyconnected
        Administrator
        • May 26 2009
        • 8787

        Here they are in 1/4"-28 NPT as well: CLICK HERE
        Member, Sons of the American Revolution

        CLICK HERE to see my custom hydraulic roller 390 FE build.

        "We've got to pause and ask ourselves: How much clean air do we need?"
        --Lee Iacocca

        From: Royal Oak, Michigan

        Comment

        • Eric S
          Super-Experienced

          • Jun 10 2018
          • 1054

          I finally placed an order for some zerk fittings from zerksplus. After talking with them I had 1/4-28 SAE-LT Taper Thread Straight Zerk.

          My mechanic will be here on saturday so we should move on work.
          We'll check the rods for bearing wears as the opil pan is out.
          What is the torque on the rods heads?

          What page in the Manual can I found the torque values? Can not find a chart listing them. Are they spread all over the manual?

          Comment

          • jopizz
            Super-Experienced


            • Nov 23 2009
            • 8345

            Originally posted by Eric S
            What page in the Manual can I found the torque values? Can not find a chart listing them. Are they spread all over the manual?
            Page 1-65 and 1-66.

            John
            John Pizzi - Squarebirds Administrator

            Thunderbird Registry #36223
            jopizz@squarebirds.org 856-779-9695

            https://www.squarebirds.org/picture_gallery/TechnicalResourceLibrary/trl.htm

            Comment

            • Eric S
              Super-Experienced

              • Jun 10 2018
              • 1054

              Thank you John

              I started putting back together the steering wheel control valve and of course I did not made enough pictures or notes.
              Can you please check the enclosed pictures and let me know if there is anything that is not on the right place or if rubber rings has the lips on the right side.
              There is several parts that are intended for GM applications. Nothing left here that should be on my part (picture with gaskets)?
              The manual that came with the parts just reprint the owner's manual and it is not really clear.

              Also on the suspension leaves, there is a bolt going through. It protrudes a little bit more and I think the rubber will be punched or will force on this bolt. Is that OK and normal?
              Attached Files

              Comment

              • Eric S
                Super-Experienced

                • Jun 10 2018
                • 1054

                Did the "Valve Rocker Arm Cover" noted on the Manual is well the valve cover?
                Last edited by Eric S; September 19, 2018, 01:57 PM.

                Comment

                • jopizz
                  Super-Experienced


                  • Nov 23 2009
                  • 8345

                  The gaskets and bushings are not on the spool correctly. The larger lip of the seals go toward the inside of the spool. The metal bushings go on the outside of the seals. The right side of the spool is correct, the left side is not. Also it looks like you have an extra o-ring on the left side (larger side) of the spool. There should only be the seal and the bushing.

                  John
                  Attached Files
                  Last edited by jopizz; September 19, 2018, 08:31 PM.
                  John Pizzi - Squarebirds Administrator

                  Thunderbird Registry #36223
                  jopizz@squarebirds.org 856-779-9695

                  https://www.squarebirds.org/picture_gallery/TechnicalResourceLibrary/trl.htm

                  Comment

                  • jopizz
                    Super-Experienced


                    • Nov 23 2009
                    • 8345

                    Originally posted by Eric S
                    Did the "Valve Rocker Arm Cover" noted on the Manual is well the valve cover?
                    Yes, that's correct. Do not overtighten. About 10 ft. lbs. is plenty.

                    John
                    John Pizzi - Squarebirds Administrator

                    Thunderbird Registry #36223
                    jopizz@squarebirds.org 856-779-9695

                    https://www.squarebirds.org/picture_gallery/TechnicalResourceLibrary/trl.htm

                    Comment

                    • Eric S
                      Super-Experienced

                      • Jun 10 2018
                      • 1054

                      John

                      the manual gives even less for the rocker covers...

                      I would also like to remind a previous concern :
                      ...on the suspension leaves, there is a bolt going through. It protrudes a little bit more and I think the rubber will be punched or will force on this bolt. Is that OK and normal? (see picture below)

                      For today
                      1.
                      On the steering valve. I put back the rubbers on the right side, lip facing each other. You (John) noticed an extra O ring on the large side; I guess it was the taper that made looks like there is a washer.
                      However if you look at the 2 pictures of the inner (yellow springs) I have a play in length like if a washer is missing. But according to the drawing, I don't have any missing. Is this play normal? One can see the plastic parts is not in contact with the plate on lne picture.

                      2.
                      On the shaft, I have been told that I should have a greaser/zerk fitting which I don't have. So we put plenty of grease in there but as you can see there is no cover or whatever in there. Is there something missing like a cover with zerk fitting?

                      3.
                      On the steering gear box I read the manual (Yes I did !) that I had to check the lubricant level by removing the lowest bolt... But I don't see what is the lowest bolt as the lowest here is just a cover bolt that screw in the box body. And from where I can fill in grease? THere is a round "plug" that I can't see how to remove.

                      4.
                      I checked for water entering from the cowl.
                      Is there any water that could enter from the side cover as on the picture (with screws removed). Should I add some kind of seal here?
                      Also I saw that the water will drain and fall on the side and pass by the cool air door. Water may enter there by this door in the car.
                      Should I have some kind of rubber cowl drain going all the way down from the top to the side cowl drain holes. (http://www.squarebirds.org/cowl_drain.htm)
                      But then it would close the channel and prevent any cold air to enter through the cold air door??
                      And I can't see any hole drains holes anywhere. I can not see from the wheel arch. Where is it suppose to be?
                      As it is now I see nowhere the water can go.
                      The 2 first pictures beow shows the bottom of the car where I was expecting to find a hole.

                      5.
                      We checked the condition of the engine with my mechanic from the removed oil pan. Everything is fine except we have a slight side play on the rods heads on the crankshaft. Nuts are tight. Is that normal the rods' heads move from side to side tightly and a little bit?

                      6. As I want to change the bushings on the lower arm, we removed the springs. I am not too familiar with that either but my mechanic said the display was different than other cars and that he can not use his regular "spring compression" tool to re-install the springs. Do we need anything special here?

                      That's all for today folks.
                      Attached Files
                      Last edited by Eric S; September 23, 2018, 06:56 AM.

                      Comment

                      • simplyconnected
                        Administrator
                        • May 26 2009
                        • 8787

                        Originally posted by Eric S
                        ...6. As I want to change the bushings on the lower arm, we removed the springs. I am not too familiar with that either but my mechanic said the display was different than other cars and that he can not use his regular tool. Do we need anything special here?..
                        What do you mean by, 'the display was different than other cars'?

                        Once your 'A' arms are out they may be serviced on a bench. You can make this job easy or hard. At first, I used simple 2" pipe nipples about 4" long, and a 5# hammer. They work quite well but require brute force.

                        Then I got smart. The urethane will melt out of a bushing with a propane torch. Do it outside. What's left is the sheet metal outer shell, in the 'A' arm. I used a hacksaw blade INSIDE the shell; one carefully placed cut and the bushing shell will collapse. Be careful not to cut the 'A' arm. The new bushing will pound right in using pipe nipples as a backup for the arm.

                        I guess if you call pipe nipples 'special tools' then the answer is, yes. I keep my ****nal of tools very simple because fancier tools simply aren't required. BTW, I re-bushed all my suspension arms without a press.

                        Connecting Rod assembly is covered in the Shop Manual. They are 'free floating' and should have clearance on the crankshaft. - Dave
                        Member, Sons of the American Revolution

                        CLICK HERE to see my custom hydraulic roller 390 FE build.

                        "We've got to pause and ask ourselves: How much clean air do we need?"
                        --Lee Iacocca

                        From: Royal Oak, Michigan

                        Comment

                        • Eric S
                          Super-Experienced

                          • Jun 10 2018
                          • 1054

                          Display different than other cars :
                          My mechanics said that he can not use his normal spring compression tool because there is no room around the spring to use it and he would have to compress them from the inside with a "special" too.

                          Comment

                          • OX1
                            Super-Experienced
                            • Feb 10 2016
                            • 557

                            Originally posted by Eric S
                            John


                            6. As I want to change the bushings on the lower arm, we removed the springs. I am not too familiar with that either but my mechanic said the display was different than other cars and that he can not use his regular "spring compression" tool to re-install the springs. Do we need anything special here?

                            That's all for today folks.
                            Some say they could get spring back in just putting
                            pressure on lower A-arm after mounting. For me A-arm
                            was nearly vertical when it touched lower spring edge and
                            that method did not work. Mine were new 430 AC springs,
                            so not sure if that mattered.

                            I used this style spring compressor. It barely fit.

                            59-430-HT

                            Comment

                            • Derbird
                              • Jul 10 2016
                              • 177

                              Use a floor jack under the ball joint to remove and install springs. Works so good they put it in the manual

                              Comment

                              • simplyconnected
                                Administrator
                                • May 26 2009
                                • 8787

                                Kyle is correct. Ford cars (since before 1954) don't need spring compressors because the lower control arm is so long. And as Kyle noted, follow your Shop Manual. This procedure is plainly covered in the Shop Manual. I hope you read it. I always release the lower arm first, then the upper arm. Assembly follows the opposite order.

                                Not using a spring compressor is safer and NO special tools are required.

                                It's important to hoist the car high enough on jack stands to allow enough room for the lower arms to drop all the way down. Then, the spring safely falls out under zero pressure. It doesn't matter what type of jack you use under the lower ball joint but I use a scissors jack.

                                If the engine is out of the car, raising the lower arm can be a challenge. You need the weight of the engine to help hold the body down on the jack stands. In this case, I make a loop with wire rope and two cable clamps. The loop reaches over the upper control arm and UNDER the scissors jack (which rests on the floor). Just about any size wire rope will work because only a couple hundred pounds of pressure are needed. The main compression comes from the weight of the body.

                                Once the lower ball joint stud pokes through the lower spindle hole, put the nut on and you're home free. - Dave
                                Member, Sons of the American Revolution

                                CLICK HERE to see my custom hydraulic roller 390 FE build.

                                "We've got to pause and ask ourselves: How much clean air do we need?"
                                --Lee Iacocca

                                From: Royal Oak, Michigan

                                Comment

                                Working...
                                😀
                                🥰
                                🤢
                                😎
                                😡
                                👍
                                👎