June 7, 2008 – I take the plunge! The bird has sat for almost four years. I decided to do a total restoration. Here are the well-known rules for restoring a car (over a period of years) :)
- You can’t take too many pictures. Thanks to the digital camera, it is easy and costs nothing to document how everything went together and comes apart.
- Bag and label all the parts as soon as you remove them. You think you’ll remember where those odd nuts and clips go years later. Guess again!
- Don’t “cheap out” with questionable parts, whether original, used or new. If you compare the cost of a quality part with the difficulty of getting to it later after everything is put together, it’s not worth it to “cheap out”.
- It will cost more than you can imagine. Don’t ever do this thinking, “I’ll sell it and make money.” You can buy a car already finished for less than you’ll spend restoring yours.
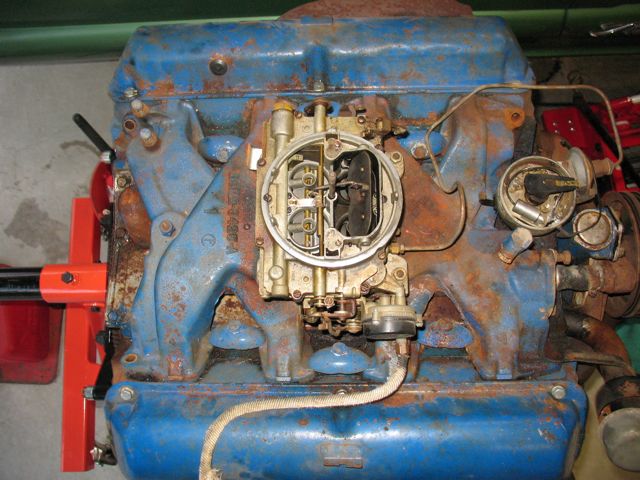
Pulling the Engine
After removing the hood, I was ready to pull the engine:
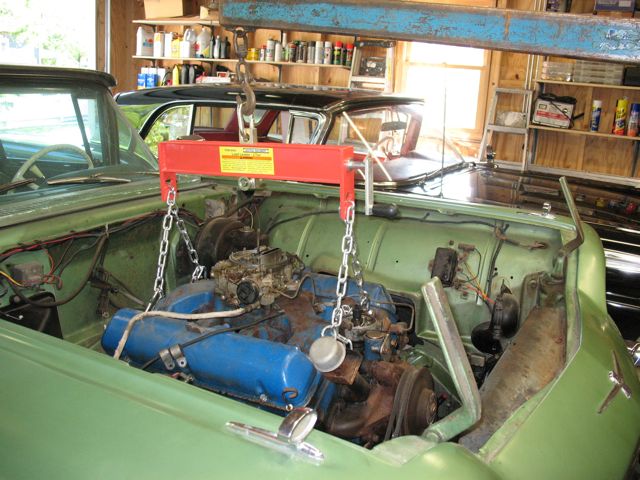
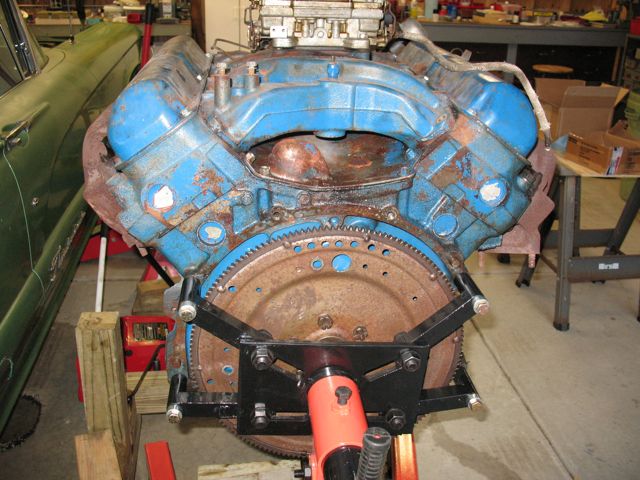
Note the Harbor Freight balancing rig. The shop manual recommends pulling the engine with the transmission attached, so some adjustment is required as the process goes along. The total weight of engine + trans must be over 1000 lbs.
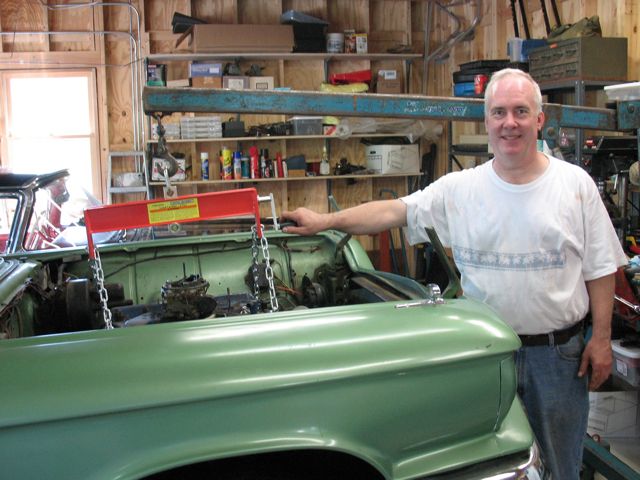
Yours truly, at the point of no return!
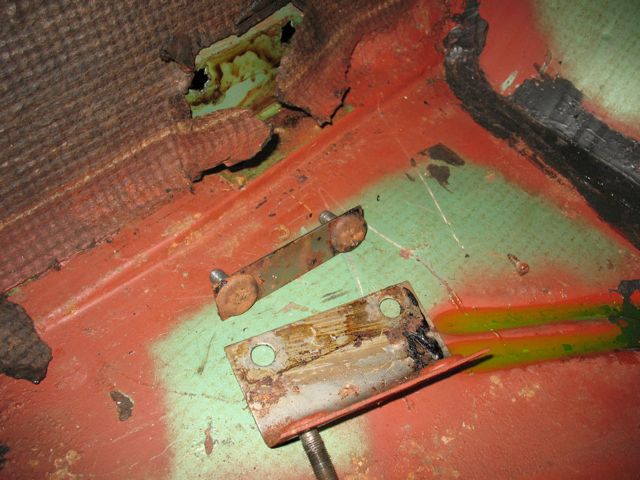
There are brackets for the transmission/engine rear mount that need to come out from inside the car. The shop manual shows this. One of the studs is broken off the bracket. It will be fixed later.
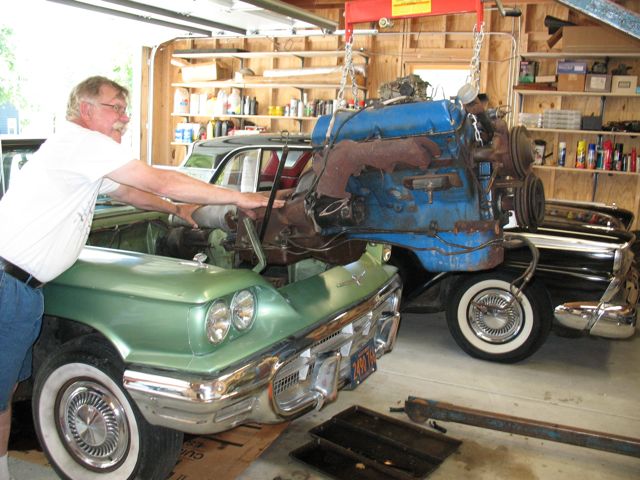
A steady hand from Ford guy Bob Sejnost averts disaster. If I were to do this again, I’d think about pulling the engine without the transmission. The total weight of engine + trans must be over 1000 lbs.
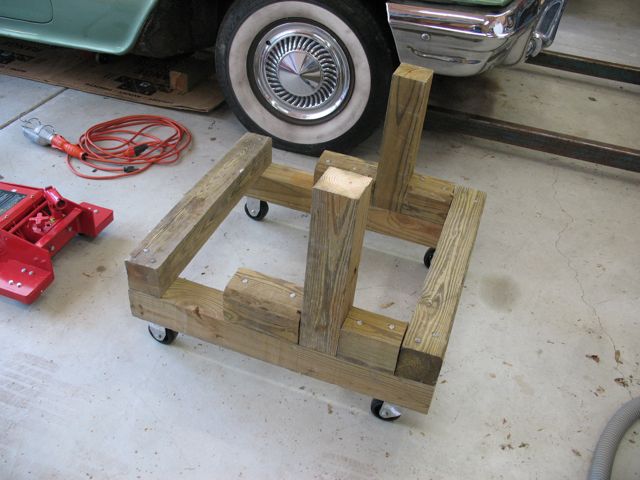
I built a special stand for the 430 from 4x4s.

Out at last!
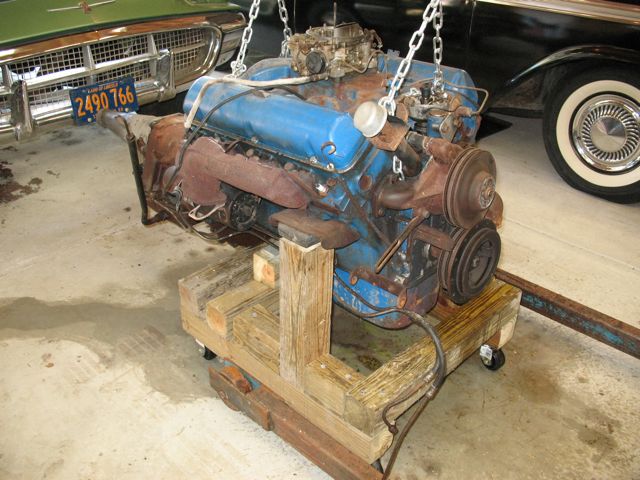
The pins on the 430’s motor mounts fit into holes in the posts of the cart.
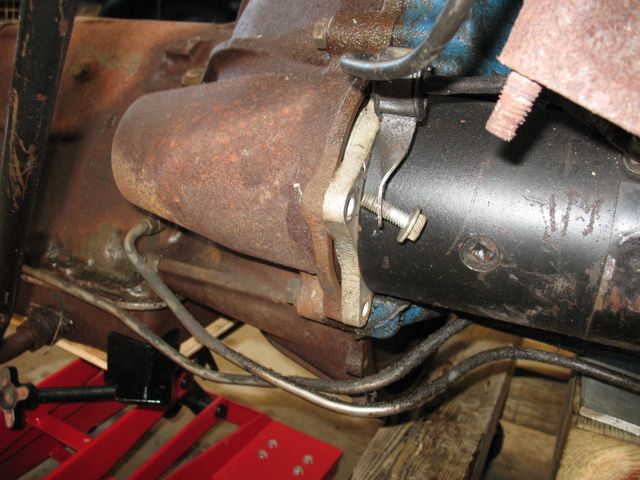
The starter would be tough to remove while in the car. Guess I’ll put back on before putting the engine back in.
Engine Disassembly and Inspection
The trans is off and the engine is now attached to the Harbor Freight heavy duty engine stand. “Ford Blue” and leaking everywhere!
The engine ran well before it was removed. The documentation also showed it had been rebuilt in 1986, and driven only a couple of thousand miles since. I decided to fix all the leaks and cosmetically restore it without a complete tear-down. Just for grins, here’s what the 430 rebuild cost in 1986:
Parts – Engine kit 740.00
Parts – camshaft 100.00
Parts – carb kit 12.09
Valve job 140.75
Degrease 20.00
Grind crankshaft 17.50
Bore cylinders 106.00
Install cam bearings 27.50
Piston change 36.00
Install freeze plugs 12.00
Labor, other 300.00
Tax 53.26
Total $1565.10
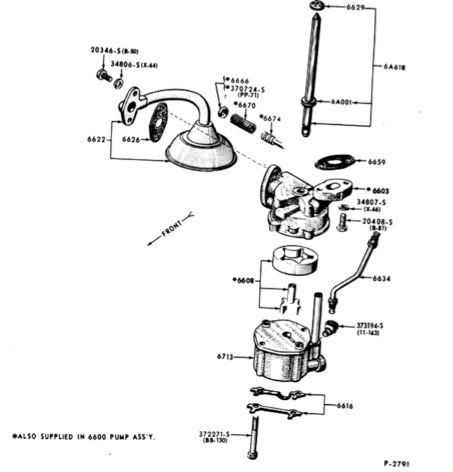
Carburetor
Carter AFB
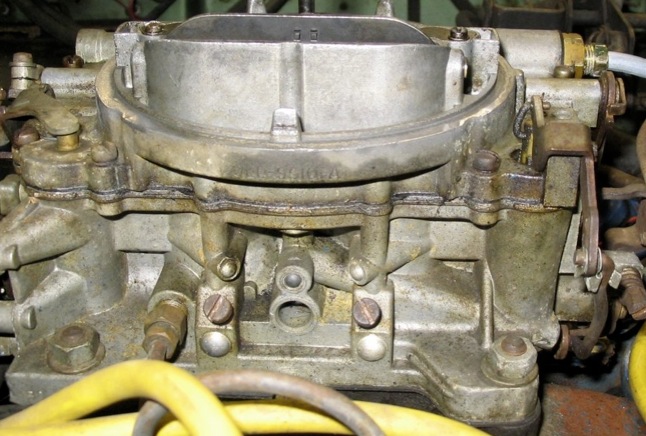
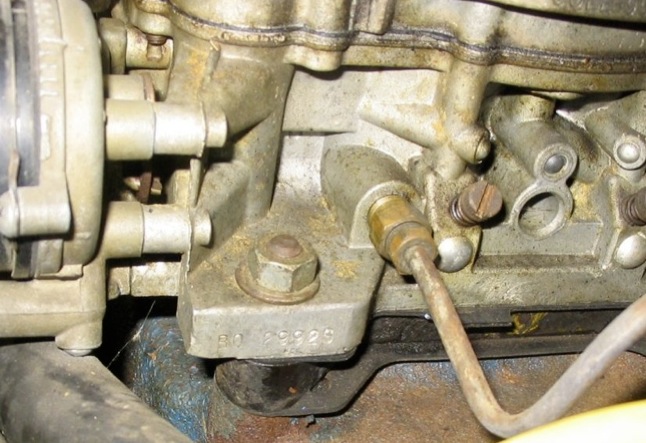
Part numbers C0LE-9510A suggests it is an original carb. Not sure what the other number on the base B0 29929 means. No tag on the cab

There were two gaskets and above the phenolic carb spacer, which had a nice crack! Yellow stamping of the word “FRONT” on the front again indicates origininality.
Water Pump
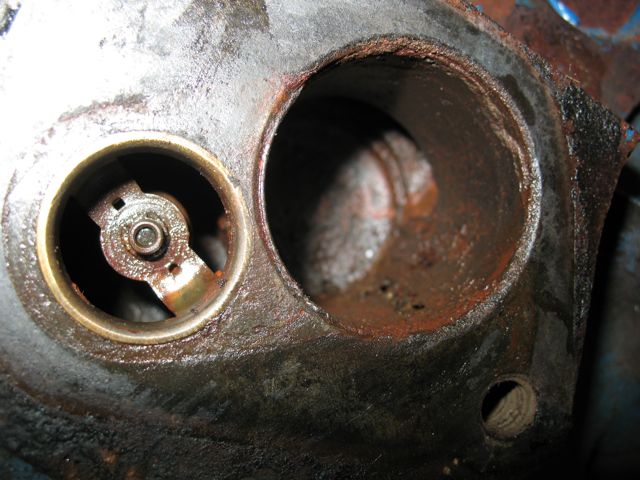
After the water pump is removed, you can see the fuel pump block-off plate and also the location of the 430’s in-block thermostats. These are shot, and the advice I have is to forget about them. The larger opening to the right is for the coolant diverters. These are important and will be replaced.
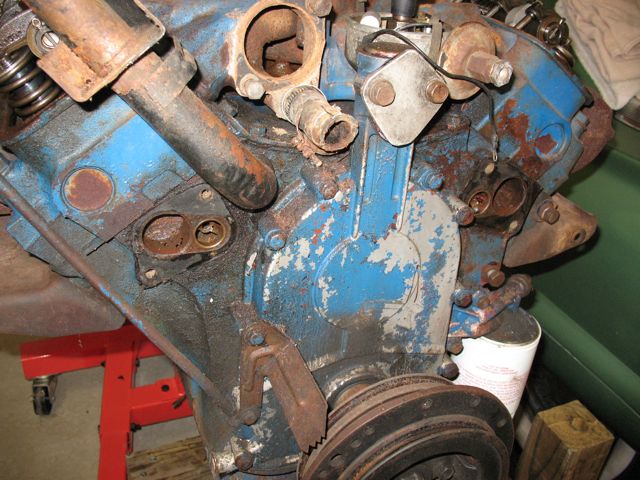
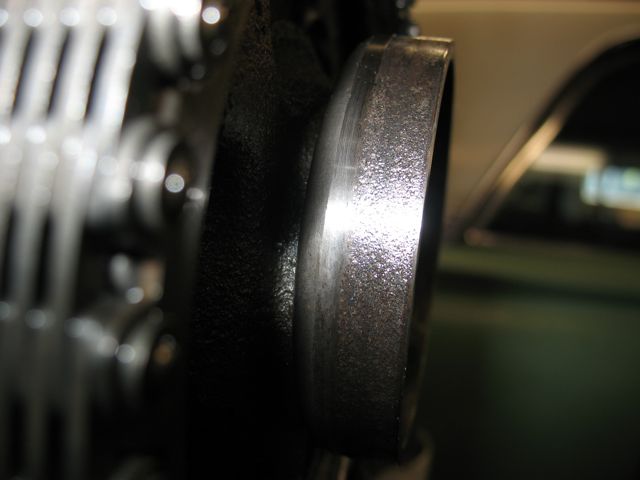
Crankshaft Sleeve
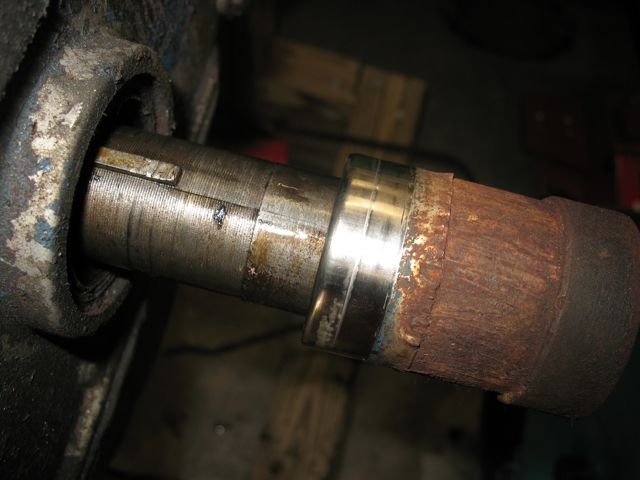
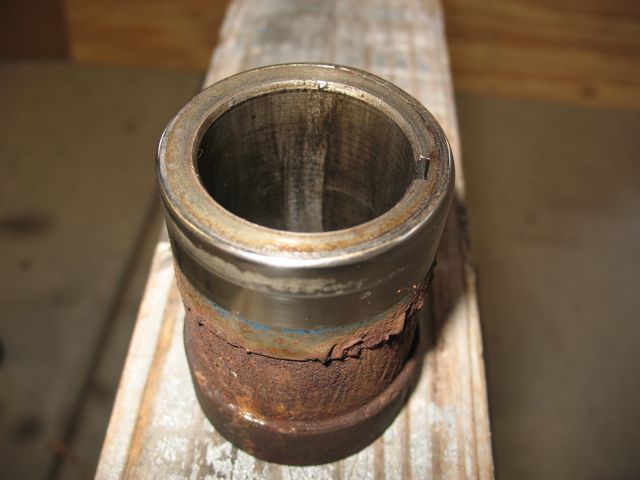
Removing the crankshaft sleeve: This has been renewed with a thin press-on sleeve. As bad as it looks, the surface that contacts the seal in the front cover is OK. It was polished and reused. Chicago Rawhide (SKF) makes these sleeves under the name SpeediSleeve.
Fuel Pump Eccentric - the guilty party!
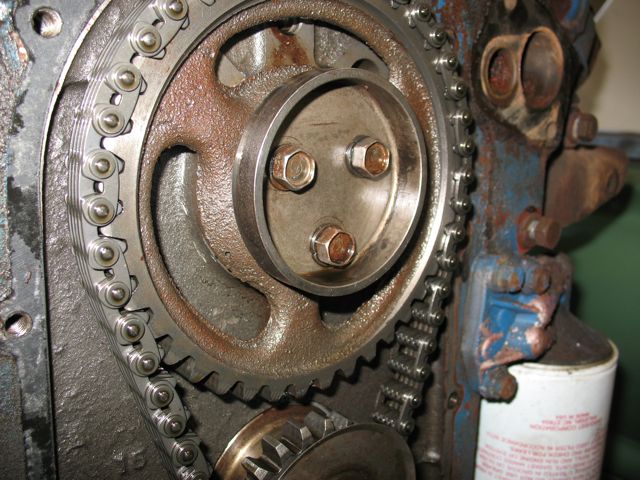
Now that the timing cover is off, the fuel pump eccentric is visible. The rough pitted surface can be plainly seen. That is what tore up the brass-tipped pushrod. The eccentric will be replaced. The timing gears and chain were new and will stay. Apparently the 430s originally came with nylon-faced gears. Perhaps someone can confirm this.
Oil Pump
The oil pump was replaced. This is a standard FE-type oil pump Note that the 430s originally had a “two-stage” oil pump: the top part was is the oil pump and the bottom is a vacuum pump. The two-stage pump is difficult to obtain and most restorers advise it is not worth the trouble. I have since found the original 2-stage pump in a box of parts that came with the car. It looks like it is seized up so I’ll use a new FE pump and drive shaft. I hear that the aux pump is needed to make the vacuum wipers work properly. I was thinking of going with electric wipers anyway so will stick with the original plan.
Valley Cover
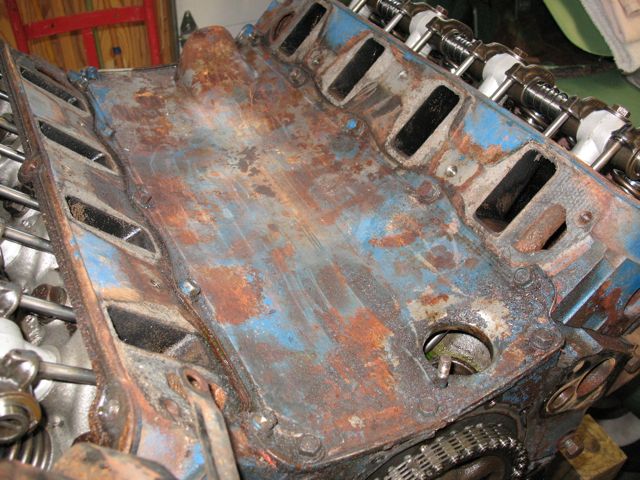
The valley cover: another difficult part to seal This was leaking badly. It is sheet metal and easily bent which makes the fitting even more difficult. At the advice of my mechanic friend, I used Permatex “The Right Stuff” for reassembly, along with the normal gasket.
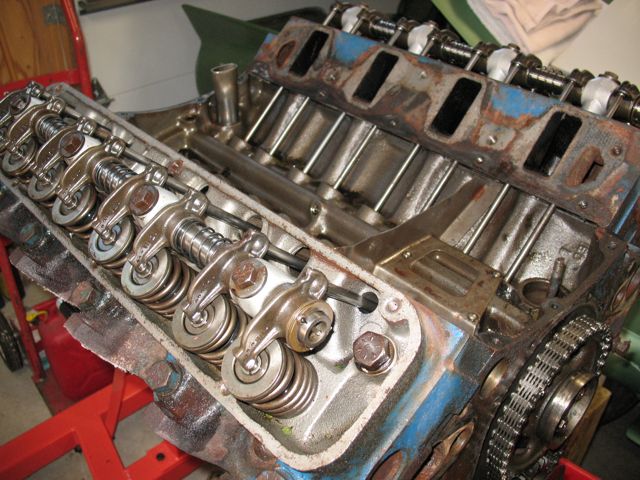
Next, here is how it looks with the valley cover off. I discovered 2 more bent pushrods. I replaced all of them, and installed new lifters as well. The rocker arm assemblies checked out OK but I had a set of NOS, so installed them instead.
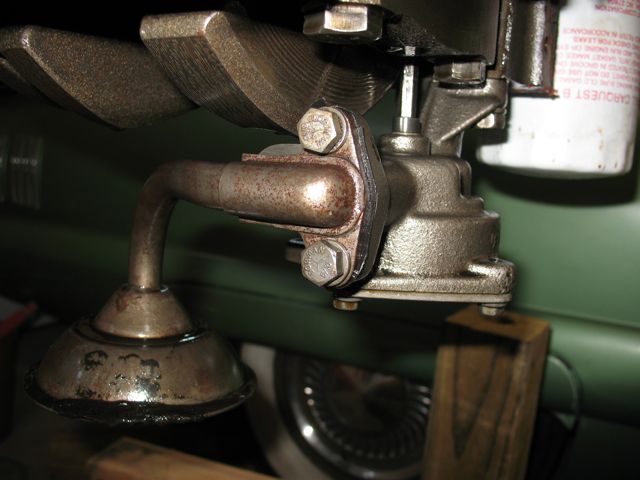
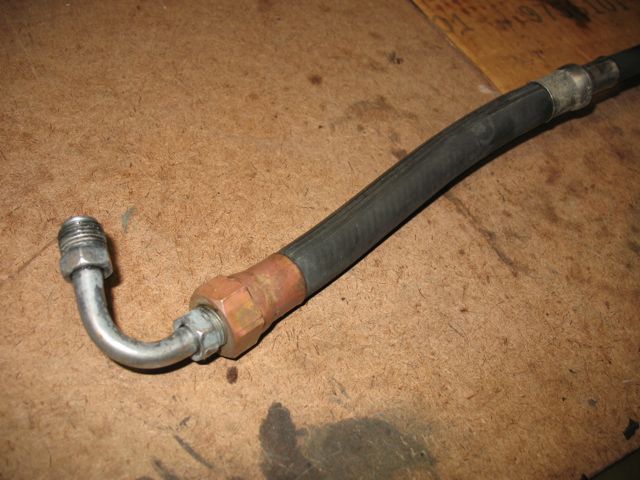
Power Steering Pump
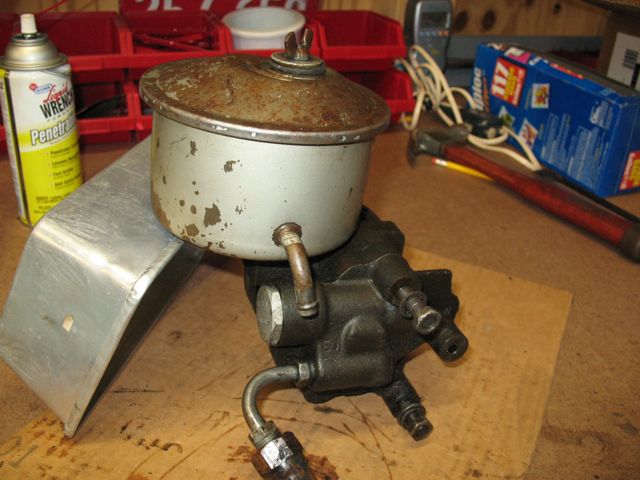
The power steering pump was working fine - no leaks. However, the high pressure hose had cracked and worn rubber. The 430 uses a special part not available from the usual sources as far as I know. I had it rebuilt with new rubber, keeping the original fittings, by The Hydraulic Shop, Skokie, IL. The guys there did a great job - highly recommended.
Timing Cover
Close inspection of the aluminum timing cover showed that it was cracked and had been repaired with JB Weld. I had to decide whether to leave it alone or get a new cover. I found a used cover on EBay and decided to use it.
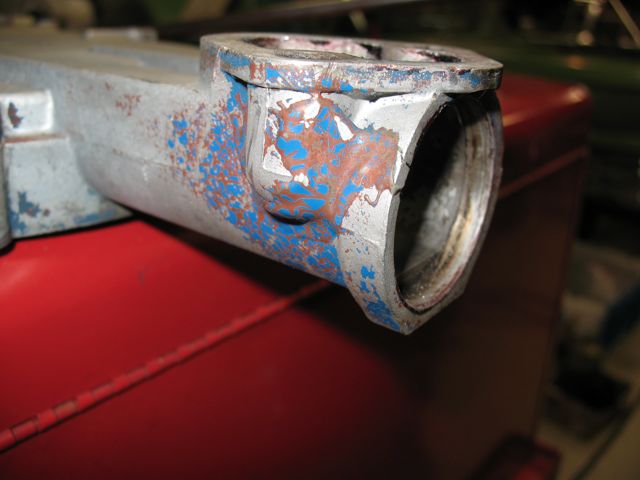
Cracked timing cover – this is where the access plug for the fuel pump pushrod goes.
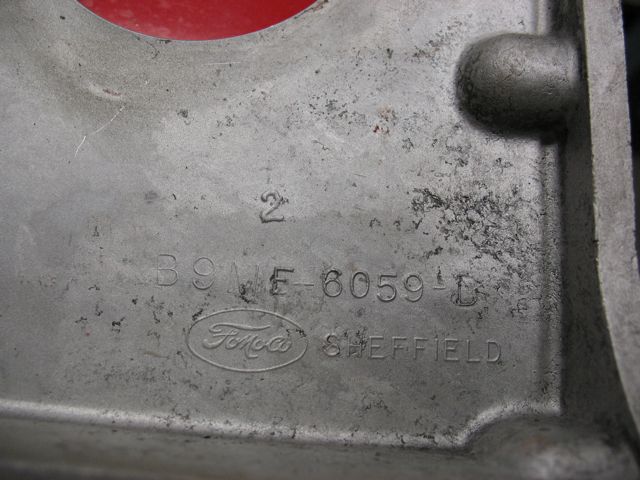
The part number B9ME-6059-D on the inside of the timing cover casting doesn’t correspond to anything in the Ford parts book, which lists the cover as
B9SZ-6019-A. The replacement part (from a Lincoln) is slightly different, but will work fine. I’d rather not take a chance on the cracked part.
Distributor
The distributor needs a replacement wire lead and vacuum advance. Both of these were found on EBay and installed on the cleaned-up distributor.
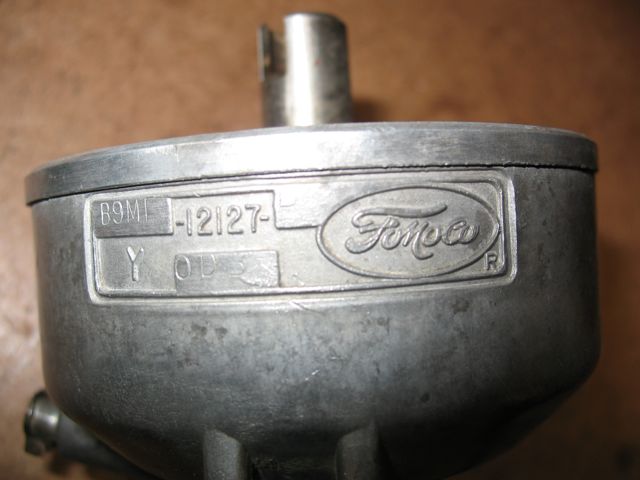
The part number B9MF-12127-B is correct for 1960 Thunderbird 430.
The diaphragm on the advance unit is shot so the engine had been running with no vacuum advance!