![]()
Replacing Rear Main Seal Without Removing Crank
on a 1958, 1959 and 1960 Thunderbird 352 Engine
The original rear main seal on the engines of these now old Thunderbirds were originally made of a rope-like material. After forty plus years many of those seals are leaking whether from wear and tear or from drying out. this article describes a method for replacing the seal without removing the crankshaft and can be done without removing the engine from the car. This procedure will work on all FE series Ford big block engines. Many other engines also can be repaired in a similar manner.
Tool Aid has a Chinese finger type tool used in the removal and installation of wick type seals. The number for the basic kit is 31500. A more comprehensive kit is available as 31700. Lisle kit number 27000 is another seal replacement kit. It costs $5.50 and is called a "Sneaky Pete". The following procedure was done using the Lisle kit.
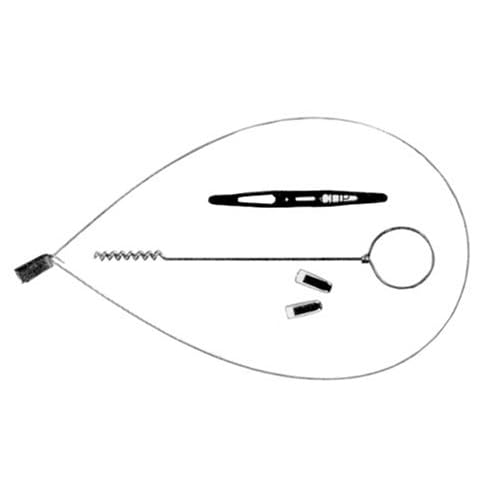
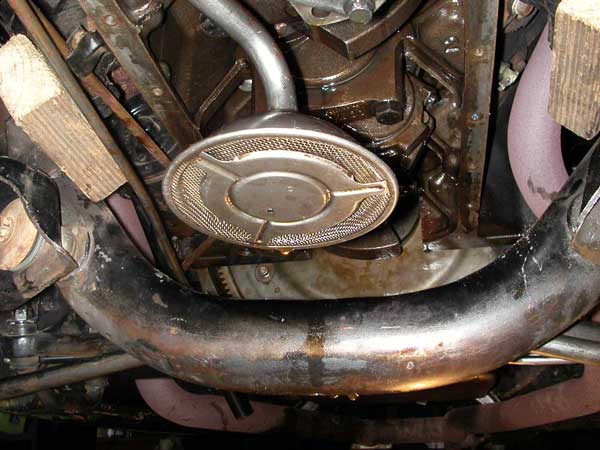
First chock the wheels of the car. Then drain the oil from the engine. Next unbolt the two side engine mounts. Raise the engine using a jack. Do not use the oil pan to rise the engine. You will bend the sheet metal. You can also raise the engine using an engine crane with a carburetor mount adapter. Use bocks of wood at the engine mont points to keep the engine raised as shown below.
Remove the bolts holding the oil pan and remove the pan. Unbolt
the rear main bearing.
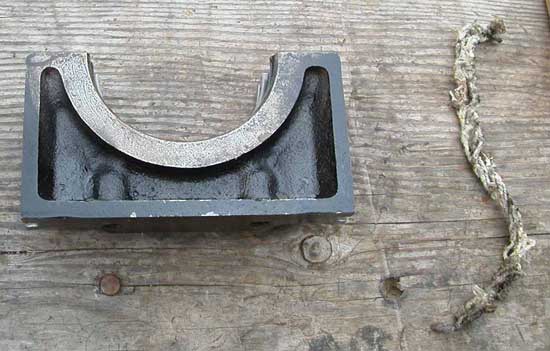
The picture below shows the lower rear main bearing and the seal that is
the seal that was failing and causing the oil leak. It had become unraveled
when
the end of it was snagged while scraping the bottom of the block to clean
off remnants of the old oil pan gasket in a previous procedure to replace
the oil pickup screen.
The picture below shows the new rubber seals that replace the wick side seals. You have to install
them with the bearing cap finger tight on the car. Then you tap those steel rods in the groove to seal the rubber against the side of the block.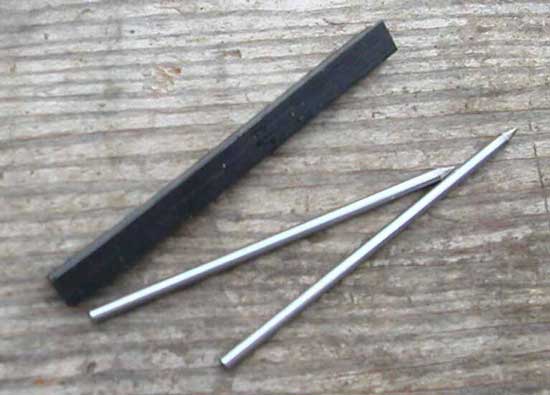
Below is a picture of the crankshaft area with the rear bearing
cap removed.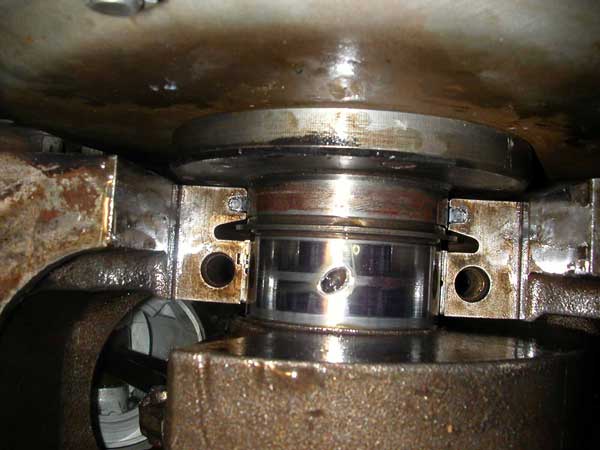
Below is a picture of the new seal temporarily placed in the
side of the cap.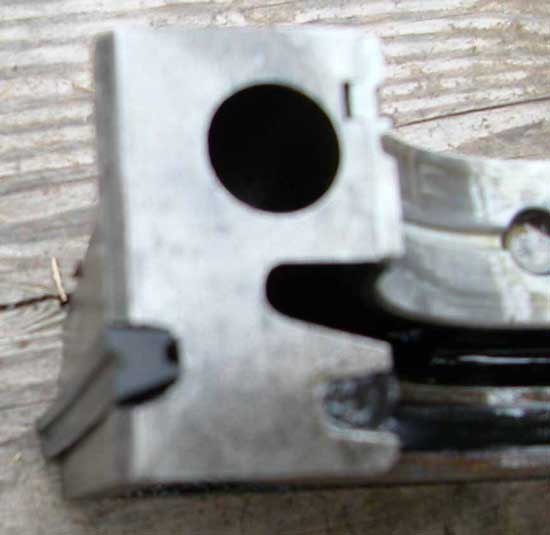
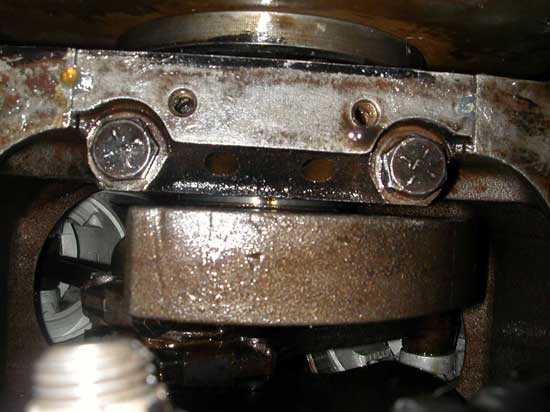
Below is a picture of the rear main bering cap reinstalled
with new seals.
There is a little dab of clear silicone covering the ends of both side seals.
When you tap in those steel pins, it pushes the rubber in about
1/16 of an inch (if that much). The instructions say to fill that little
depression with silicone.
Casey Tarp, who did this repair, says this was one of the more difficult repair jobs he has attempted. (He didn't replace the upper half seal above the crank as it looked brand new.) He did the job with the car on ramps. Between the limited working room and the oil dripping down onto your face, it makes for a very unpleasant afternoon. A vehicle lift would make this procedure easier.
Especially hard was driving those steel pins in. There is barely enough room for a hammer head because of the crank shaft components, power steering cylinder, and other linkages. There's just no room to do anything. Just small very precise taps are allowed to drive those pins in.
It takes a lot of patience and careful work to get the job done. Still, it is easier than removing the engine and crank.
Casey does not want to do this repair again! After the repair, he ran the car and didn't see any leaks, so maybe he won't have to!
Pictures and information by Casey Tarp.